2. Interfaces#
On this part, we explain the interface of Pohlke
Our layout is composed of three main interfaces:
A set of functions can also be accessed from the text editor & Python console. (Beta version)
2.1. Configuration Panel#
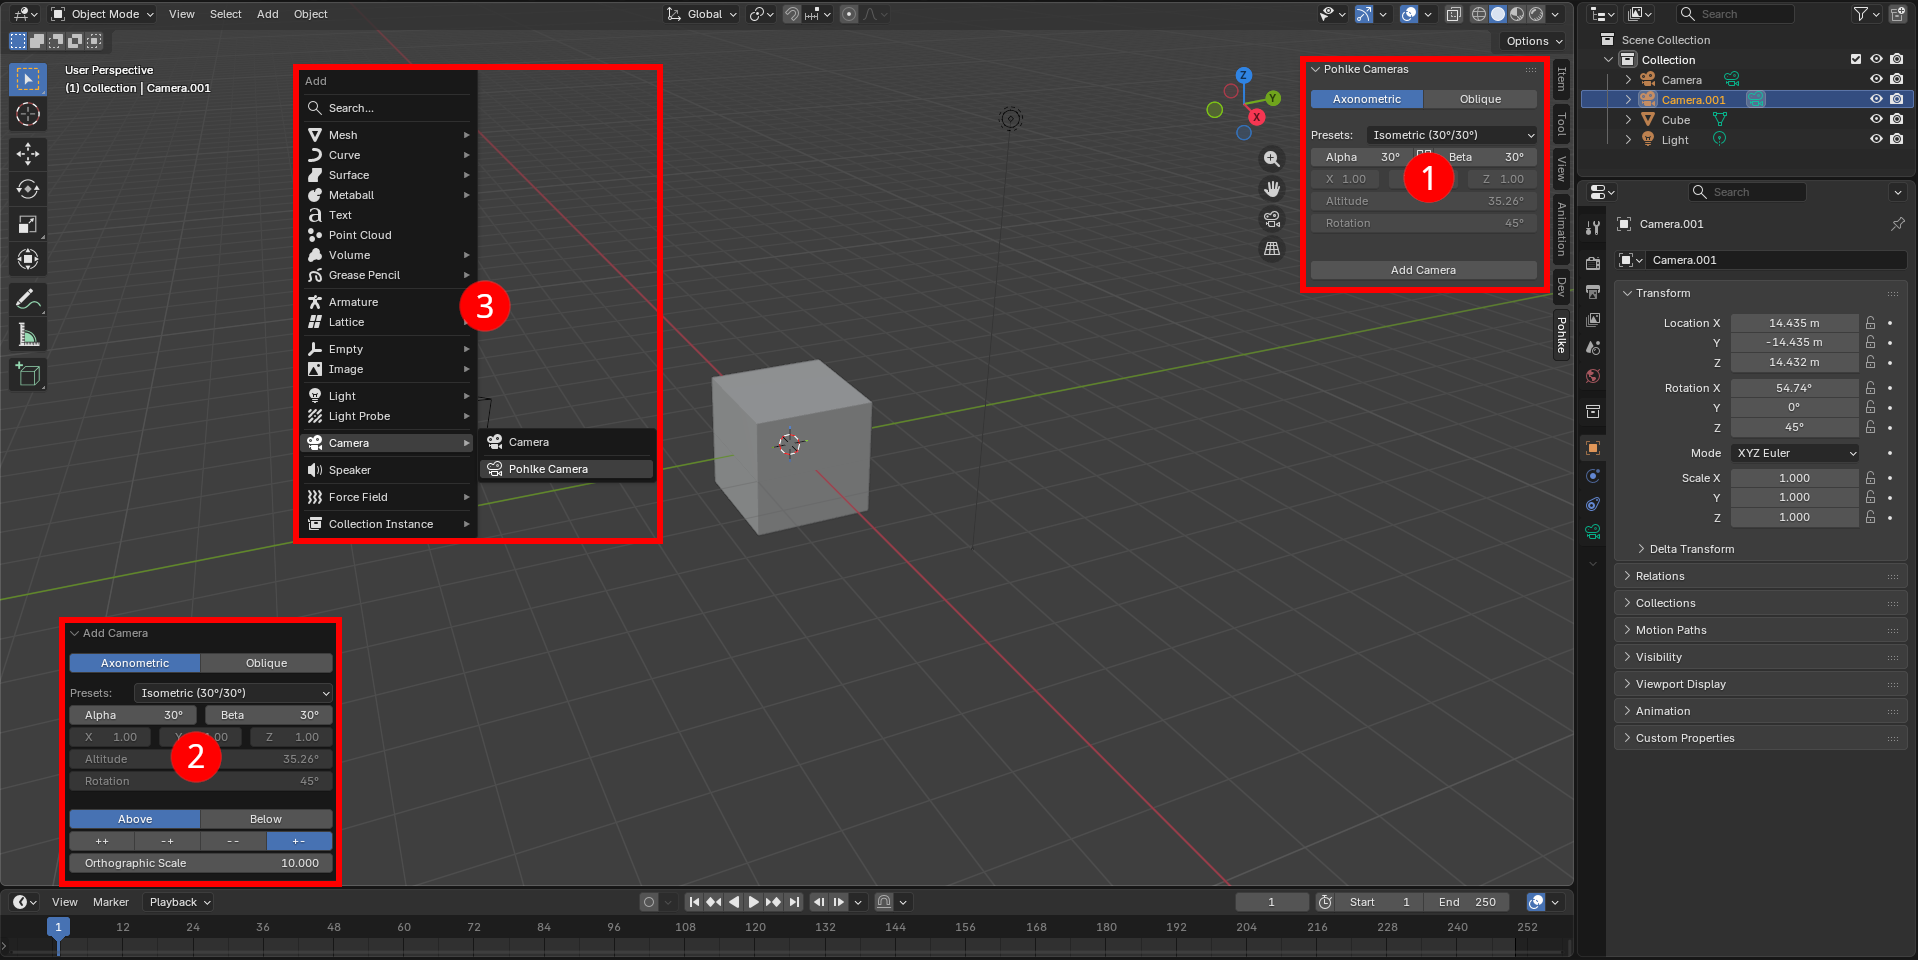
2.1.1. Description#
This panel is the first visible element that appears when using the add-on: it allows you to configure and create a camera.
2.1.2. Composition#
2.1.3. Details#
Component |
Description |
|---|---|
Class of type |
|
Class of type |
|
Operator of type |
2.2. Post-Creation Adjustment Menu#
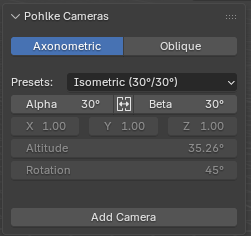
2.2.1. Description#
This menu appears in the bottom-left corner of the screen once the camera has been created. It allows you to continue modifying the camera’s configuration parameters immediately after creation, with a real-time preview of the changes.
2.2.2. Composition#
2.2.3. Details#
Component |
Description |
|---|---|
Custom |
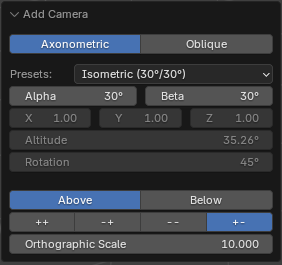
2.3. Quick Camera Creation#
2.3.1. Description#
This feature allows you to create a Pohlke camera directly from Blender’s creation menu, accessible via the shift + a keyboard shortcut.
2.3.2. Composition#
2.3.3. Details#
Component |
Description |
|---|---|
Camera entry in Blender’s quick creation menu. |
|
Operator of type |
2.4. Text Editor & Python Console (Beta version)#
2.4.1. Description#
The scripting interface provides a way to use the add-on in Python scripts within Blender. Check out the pohlke.scripting.Scriber object in the API documentation to have an overview of the available functionalities.
The interface is instantiated inside pohlke.register() with bpy.pohlke = scripting.Scriber() when the add-on is enabled in the preference menu. The user can then simply make use of bpy.pohlke in their scripts.
2.4.2. Composition#
bpy.pohlke = Scriber()
2.4.3. Details#
Component |
Description |
|---|---|
Object exposing a series of handy attributes and methods that can be used in scripts, amongst others: |
|
Wrapped in each |